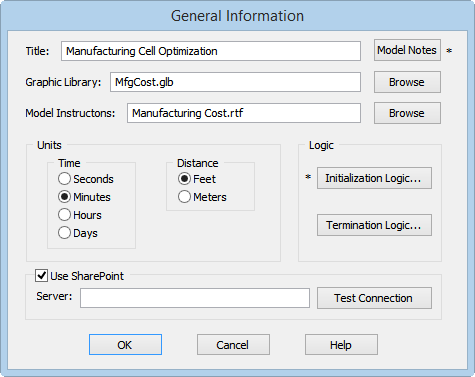
The fields of the General Information dialog box are as follows:
Title An optional, brief description of the model. Information will be displayed in the caption bar and included in the model and results files.
Time Units The unit for any time value in the model that does not have an explicitly specified time unit. The smallest unit of time available in
Distance Units The units in feet or meters for all distances specified in the model. There is no practical limit on the size of the model.
Model Notes... Brings up a notes window for specifying general notes about the model. Notes are optional and are for user reference only. An alternative way to display notes is using a Display statement (see Display) in the initialization logic.
Graphic Library File Opens a dialog box for selecting the graphic library file to use with the open model. Graphics library files have the extension GLB and are further explained later in this section.
Model Instructions Opens a dialog box for selecting the model instructions to use with the open model. Files for model instructions have the extension RTF.
Initialization Logic Opens the Initialization Logic window for specifying initialization logic. An asterisk (*) next to the name of the button means that some initialization logic has been defined for the model. (See Initialization Logic.)
Termination Logic Opens the Termination Logic window for specifying termination logic. An asterisk (*) next to the name of the button means that some termination logic has been defined for the model. (See Termination Logic.)
Use SharePoint If the check box is selected, SharePoint can be used as a shared document library. (See Use SharePoint.)
Server If the Use SharePoint check box is selected, the Internet address of the intended SharePoint server must be typed in this text box. The text box is unavailable if the check box is cleared.
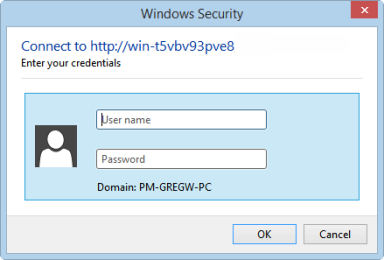
Test Connection Opens the Windows Security dialog box, which confirms access to the SharePoint server when the proper user name and password are typed into the respective text boxes. The button is unavailable if the check box is cleared.
Initialization logic allows you to initialize arrays, variables, and other elements at the beginning of a simulation run as shown below:
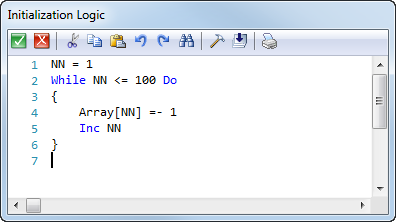
Other common uses of initialization logic include:
For a discussion of each of the buttons in the Initialization Logic window, see Editing Logic Windows.
Termination logic allows you to summarize data or write special statistics to an output file at the end of a simulation run as shown below:
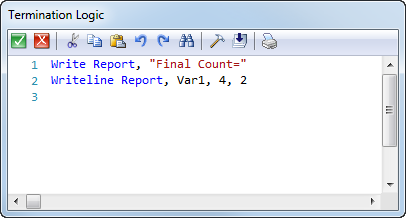
Other common uses of termination logic include:
See the following page for a discussion on the placement of initialization and termination logic within the sequence of run-time events.
Please Note: Although Initialization and Termination logic cannot be tested with the Compile option in the Edit menu, as with Processing or Arrival logic, the logic can be tested by clicking on the compile button in the logic window.
It is important to understand exactly when initialization and termination logic is executed. When you select Run from the Simulation menu the following things occur in the order listed:
Logic elements that figure into a model's structure are evaluated only when the model is loaded into the simulation module. Those logic elements are:
For a complete list of when each field is evaluated, see Appendix.
Any variables or arrays used in an expression that change any of these logic elements should be initialized in the Variables Editor, Arrays Import,scenario manager and not in the initialization logic. The model structure cannot change after the model has been loaded into the simulation module. Thus, any variable or array figuring into a location's capacity and initialized in the initialization logic will be initialized too late to affect the location's capacity.
Variables or arrays which do not figure into a location's capacity may be initialized in the Initialization Logic without any problem. A variable initialized in the initialization logic could be used as the “First Time” for an arrival or downtime occurrence. This is true because arrivals and downtime occurrences are simulation events, and all initialization logic occurs before the first simulation event.
How to select the desired graphics library:
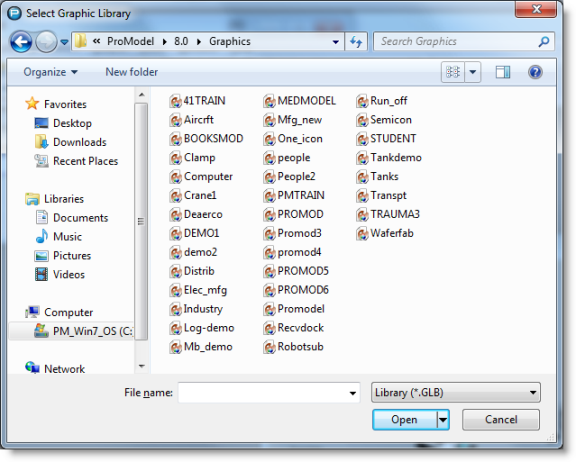
Please Note: Only files with the extension GLB may be used as graphics libraries. For more information on creating, merging and saving graphics libraries, see Graphic Editor.
This feature allows you to use SharePoint as a shared document library. It will enable reading data from, and writing data to, external files residing on a SharePoint server. It will also enable accessing files on a SharePoint server for importing data into arrays and exporting data from arrays. For using SharePoint with arrays and with external files, see Accessing Files for Arrays on SharePoint and Accessing External Files with SharePoint. You can test and confirm the connection to the SharePoint server with the following procedure:
|
© 2016 ProModel Corporation • 556 East Technology Avenue • Orem, UT 84097 • Support: 888-776-6633 • www.promodel.com |
